

Recessed can lights are a sleek and versatile lighting solution that can transform any room. At PacLights, we’ve seen countless homeowners enhance their spaces with these fixtures.
If you’re considering installing your first recessed can light, you’re in the right place. This guide will walk you through the entire process, from understanding the basics to completing the installation.
What Are Recessed Can Lights?
Definition and Components
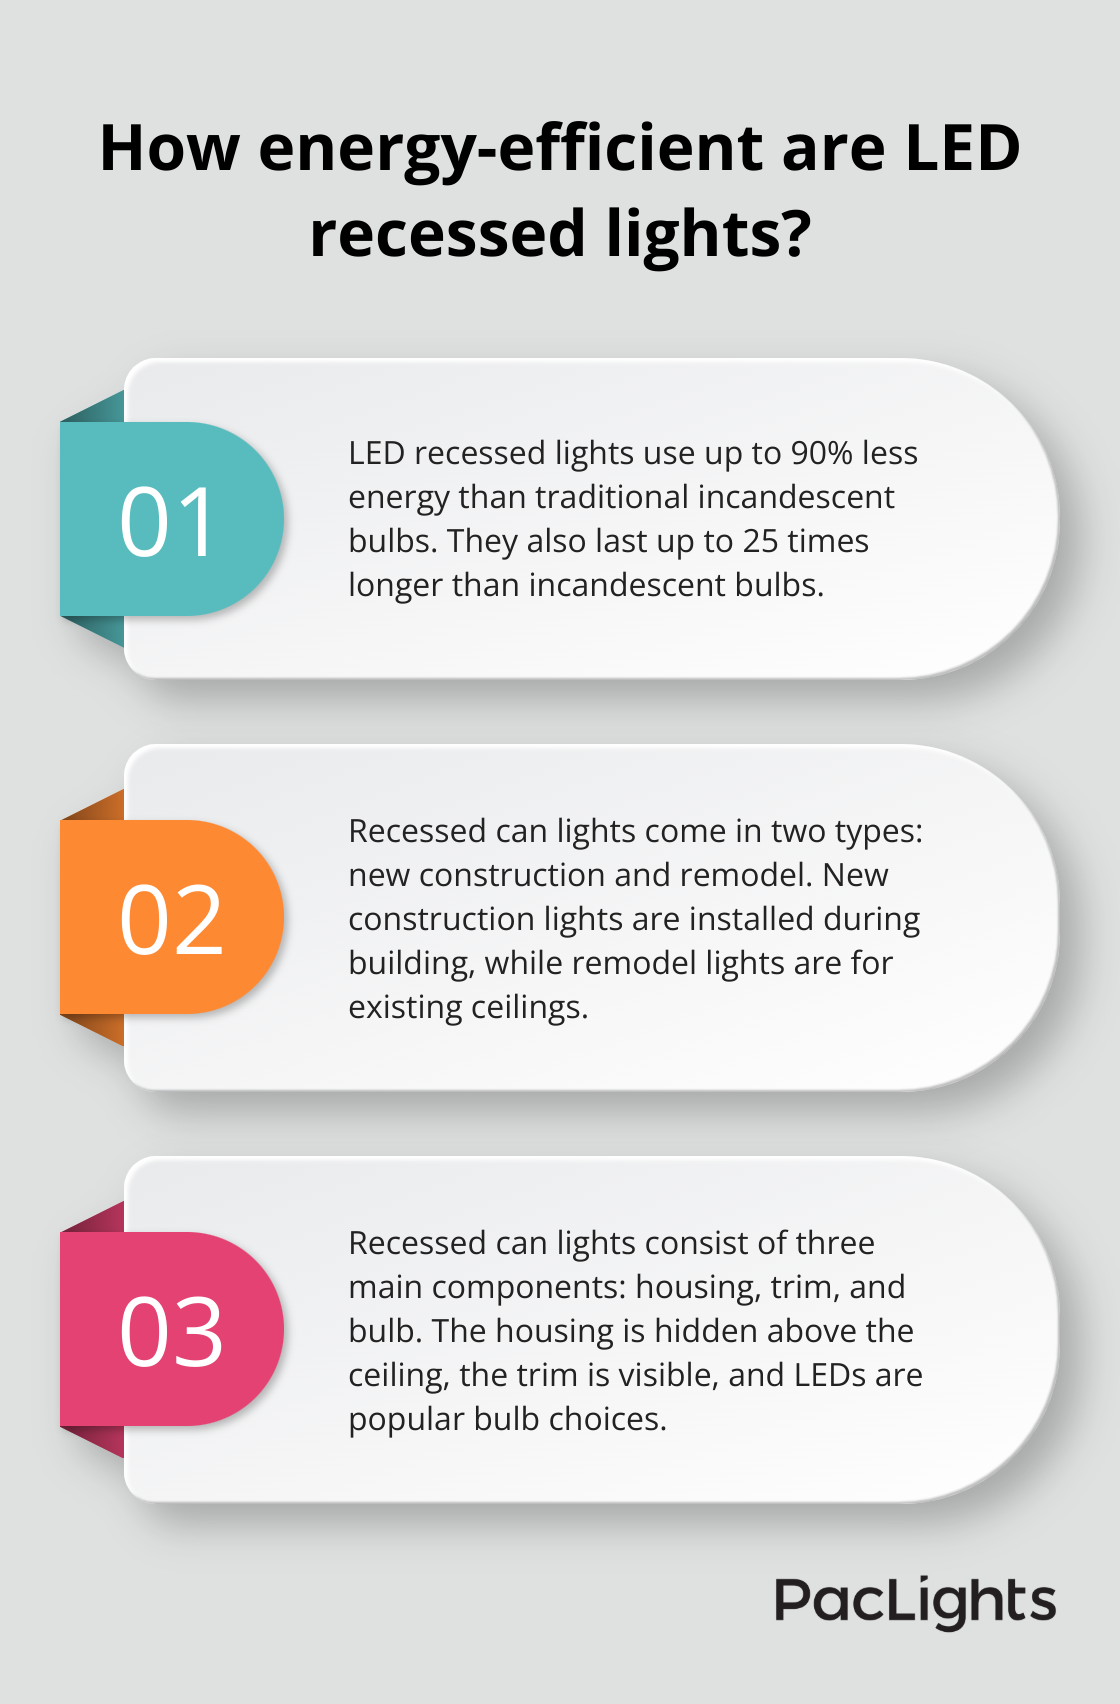
Recessed can lights, also known as downlights or pot lights, are lighting fixtures that sit flush with your ceiling. These fixtures consist of three main components:
- Housing: The “can” part hidden above the ceiling, which contains electrical connections and supports the lamp holder.
- Trim: The visible part that sits flush with the ceiling, available in various styles and finishes to match your decor.
- Bulb: The light source (LED, incandescent, or CFL). LEDs are popular due to their energy efficiency and longevity.
Types of Recessed Can Lights
Two primary types of recessed can lights exist:
- New Construction: Designed for installation during building or major renovation when you have full access to ceiling joists.
- Remodel: Perfect for adding recessed lighting to existing ceilings without major construction work.
Advantages of Recessed Lighting
Recessed can lights offer several benefits:
- Space-saving: They don’t protrude from the ceiling, which makes rooms feel more spacious.
- Versatility: They work well in various settings (kitchens, living rooms, bathrooms).
- Focused lighting: They provide directional light, ideal for task lighting or highlighting specific areas.
- Energy efficiency: When paired with LED bulbs, recessed can lights can reduce energy consumption significantly. LEDs use up to 90% less energy and last up to 25 times longer than traditional incandescent bulbs.
Selecting the Right Recessed Can Light
Consider these factors when choosing recessed can lights:
- Size: Common sizes range from 3 to 6 inches in diameter. Larger sizes provide more general lighting, while smaller ones suit accent lighting.
- IC Rating: If your ceiling has insulation, select IC-rated (Insulation Contact) fixtures to prevent fire hazards.
- Trim style: Options include baffle (reduces glare), reflector (maximizes light output), and adjustable (allows directional lighting).
- Voltage: Most residential recessed lights use line voltage (120V), but low voltage options (12V) are available for specific applications.
As we move forward to the installation process, it’s important to understand the tools and safety precautions necessary for a successful project. Let’s explore the preparation steps required before you begin installing your recessed can lights.
How to Prepare for Recessed Can Light Installation
Gather Your Tools and Materials
To start, collect all necessary tools and materials. You’ll need:
- Drywall saw or hole saw
- Wire strippers
- Voltage tester
- Electrical tape
- Wire nuts
- Screwdriver
- Safety gear (gloves and safety glasses)
- Recessed can light fixture
- Electrical wire (14/2 or 12/2 gauge)
- Junction box (if adding a new circuit)
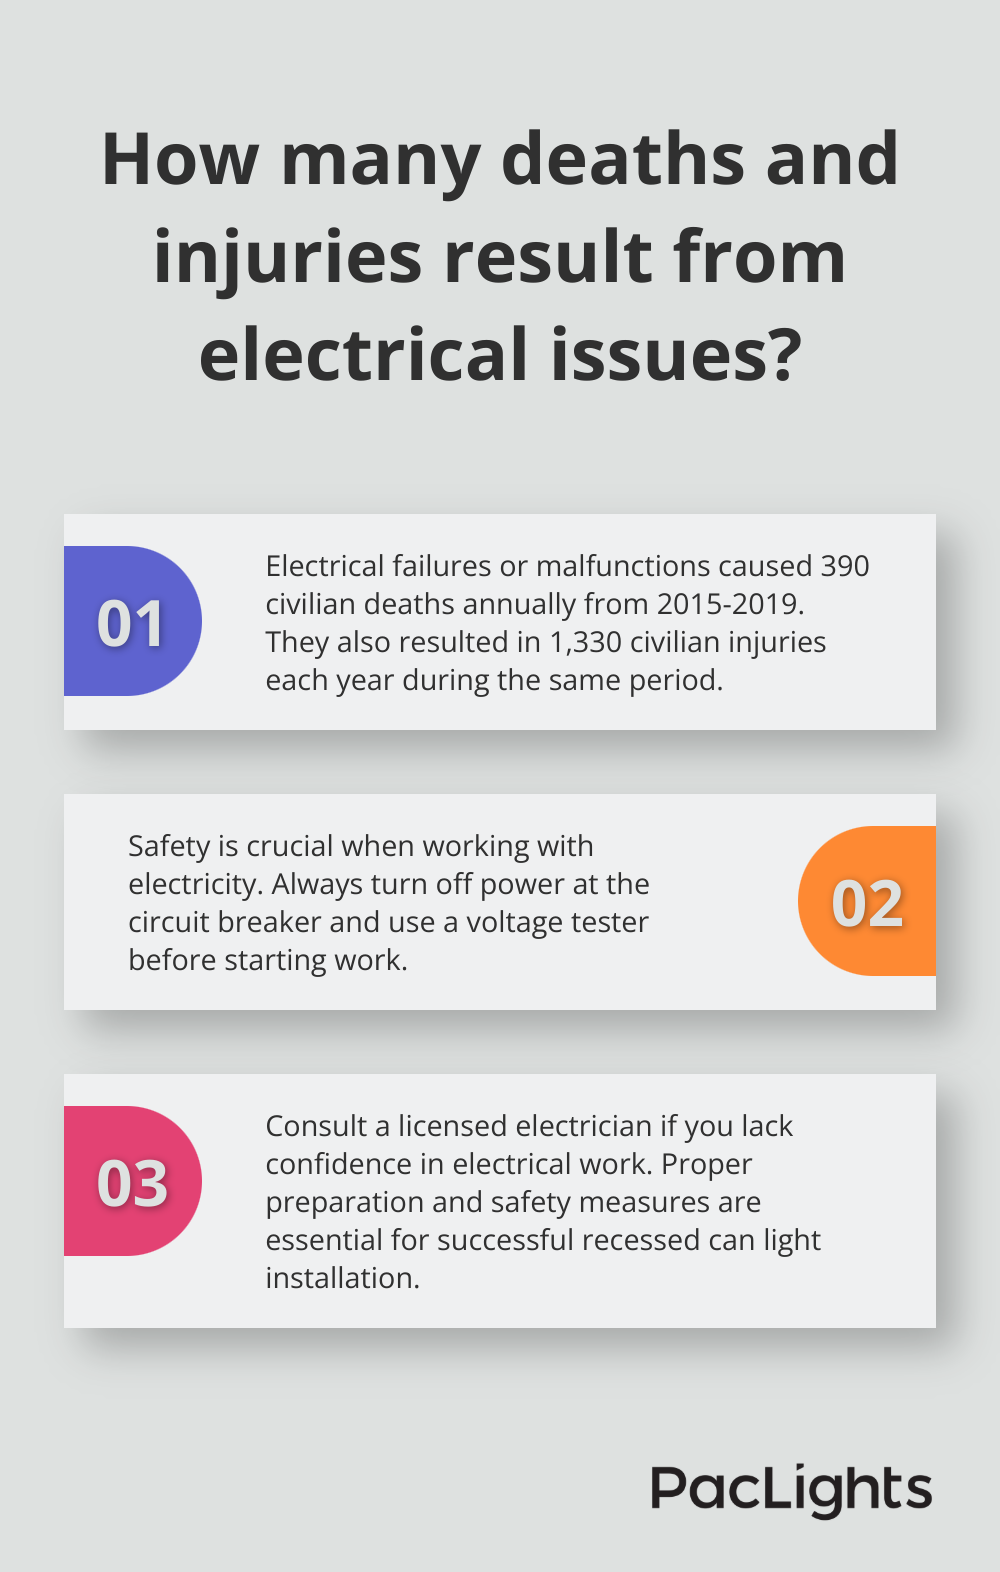
Prioritize Safety
Safety must come first. Always turn off the power at the circuit breaker before you start any electrical work. Use a voltage tester to confirm that the power is off in your work area. If you lack confidence in electrical work, consult a licensed electrician. Electrical failures or malfunctions resulted in 390 civilian deaths and 1,330 civilian injuries each year from 2015–2019, which underscores the importance of safety precautions.
Select the Ideal Location
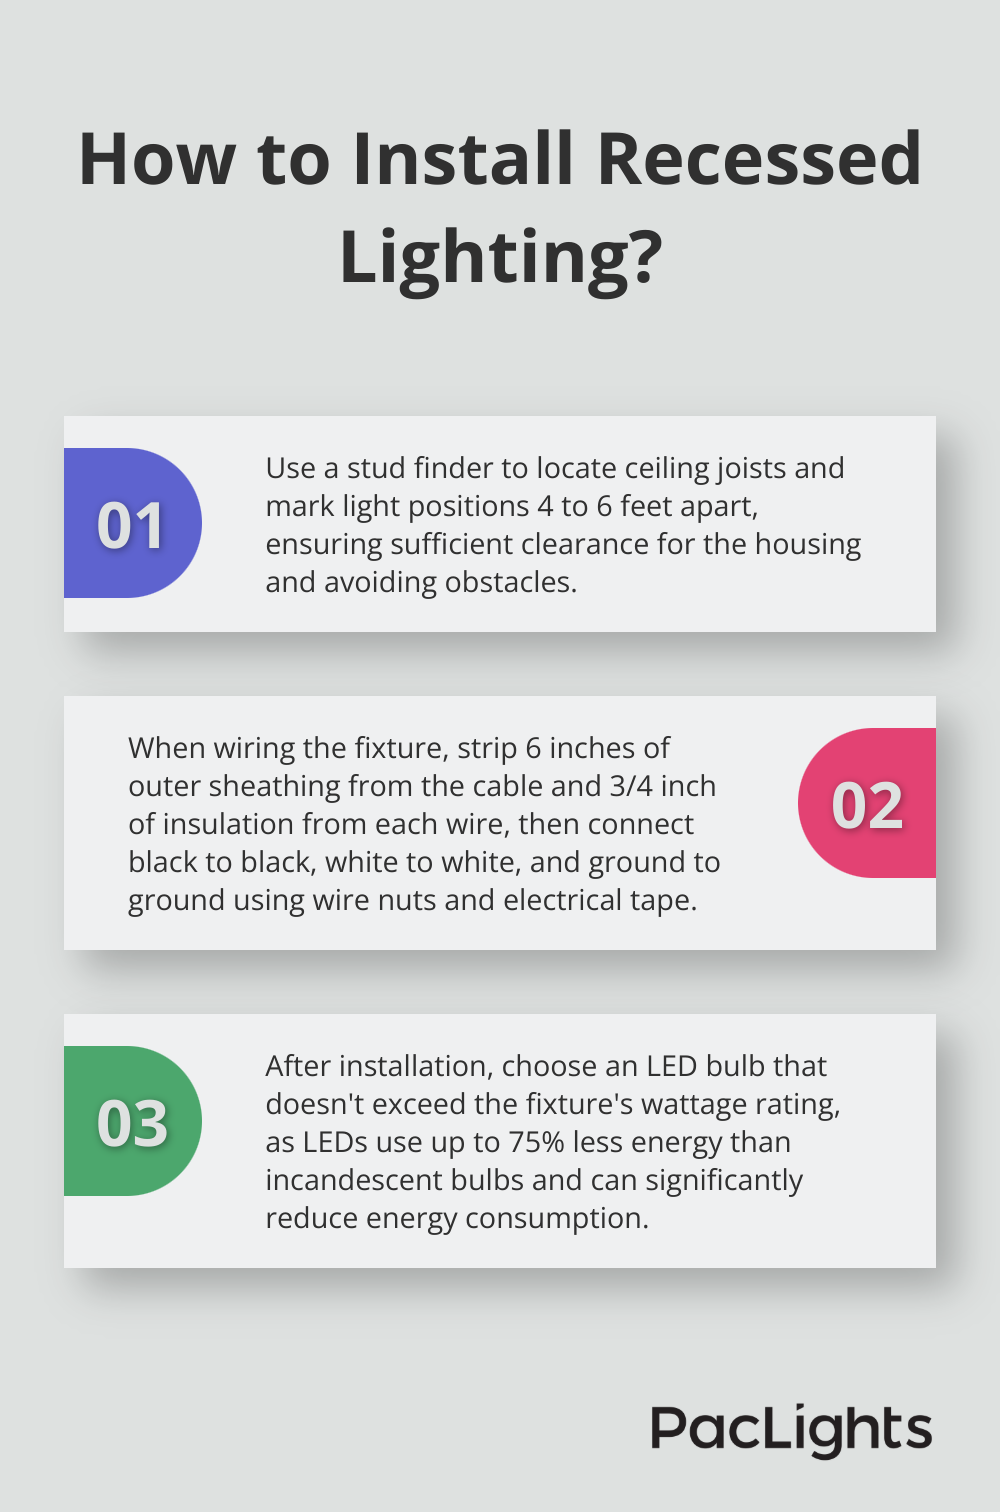
The right location for your recessed can light is key for optimal illumination. Consider your room’s layout and the purpose of the lighting. For task lighting, place lights directly above work areas. For accent lighting, position lights 12-18 inches from the wall to create a wash effect. Avoid placing lights near ceiling joists or other obstacles. Use a stud finder to locate joists and ensure sufficient clearance for the housing.
Measure and Mark
Precise measurements result in a professional-looking installation. Use a tape measure to determine the spacing between lights. A common guideline suggests spacing recessed lights 4 to 6 feet apart. After you determine the locations, use a pencil to mark the center of each light. Then, use the template (provided with your recessed can light) to trace the outline of the hole you’ll cut.
With these preparations complete, you’re ready to move on to the actual installation process. The next section will guide you through the step-by-step procedure of installing your recessed can light, from cutting the ceiling hole to connecting the wiring.
How to Install a Recessed Can Light
Create the Perfect Opening
Start by cutting the hole in your ceiling. Use the template provided with your recessed light fixture to trace the outline on the ceiling. Cut along this line using a drywall saw. Work slowly to ensure a clean, precise cut. If you use a hole saw, set it to the correct diameter and drill steadily. Wear safety goggles to protect your eyes from falling debris.
Set Up the Electrical Connection
Install the electrical box. If you tap into an existing circuit, locate the nearest junction box. Run the electrical cable from this box to your new recessed light location. For new circuits, install a junction box near the recessed light location. Always follow local electrical codes when running new wiring. (Fire departments responded to an estimated average of 46,700 home fires involving electrical failure or malfunction each year in 2015–2019, so proper installation is essential.)
Wire Your New Fixture
Strip about 6 inches of outer sheathing from the electrical cable. Then, strip about 3/4 inch of insulation from each individual wire. Connect the black wire (hot) from the cable to the black wire on the fixture, the white wire (neutral) to the white wire, and the bare copper or green wire (ground) to the green wire or grounding screw on the fixture. Use wire nuts to secure these connections, and wrap them with electrical tape for added security.
Secure the Can in Place
With the wiring complete, insert and secure the can. Push the wiring and the can up into the ceiling hole. Most remodel cans have clips or springs that hold them in place. For new construction cans, secure them to the ceiling joists. Ensure the can sits flush with the ceiling surface for a polished look.
Add the Finishing Touches
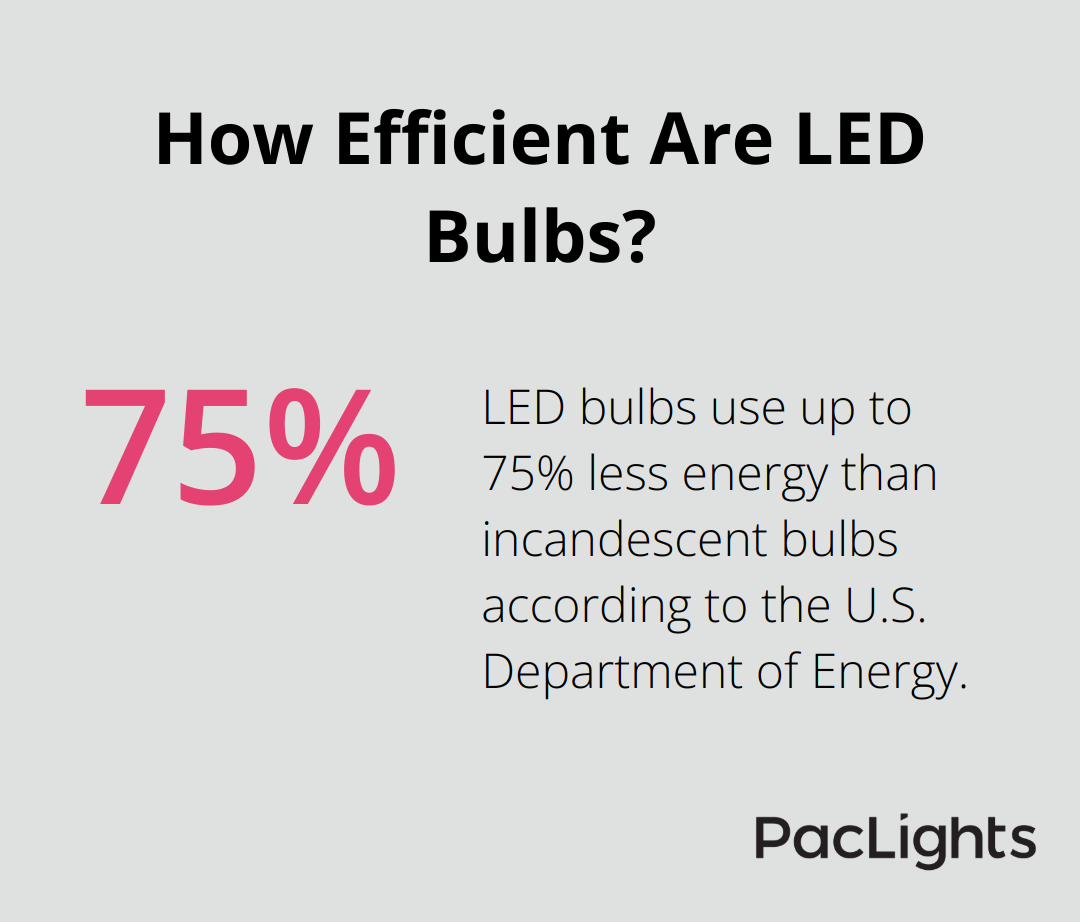
Install the trim and light bulb. The trim snaps or screws into place, covering the edge of the cut hole and giving your installation a finished appearance. Choose an LED bulb for energy efficiency (they use up to 75% less energy than incandescent bulbs according to the U.S. Department of Energy). Make sure the wattage doesn’t exceed the fixture’s rating.
After installation, turn the power back on and test your new recessed can light. If it doesn’t work, double-check your wiring connections. If problems persist, consult a professional electrician. Your safety is paramount, and proper installation ensures your new recessed can light will provide beautiful, efficient illumination for years to come.
Installing your first recessed can light can transform your home’s lighting and ambiance. You must prioritize safety, choose the right fixtures, and follow local electrical codes throughout the installation process. Clean your recessed can lights regularly with a soft cloth and replace bulbs as needed to maintain optimal performance.
Complex installations or electrical work beyond your comfort level should be handled by professionals. If you’re unsure about any aspect of the installation process, consult a licensed electrician. PacLights offers a wide range of energy-efficient lighting solutions designed to meet diverse needs (including recessed can lights).
Our products can help you create the perfect lighting scheme for your space while reducing energy costs. You can successfully install recessed can lights and enjoy improved lighting in your home for years to come. Recessed can lights offer a sleek, versatile solution that can enhance any room in your house.
Disclaimer: PacLights is not responsible for any actions taken based on the suggestions and information provided in this article, and readers should consult local building and electrical codes for proper guidance.